Monday, March 30, 2009

Oh, Beans!

Favas and Chickpeas

If you're like me, you love beans. Almost any kind of bean is just really fulfilling to eat, but my two favorites may be favas and chickpeas.

The latter I loved in their salad-bar reality when I was a kid, and of course in hummus.

Think hummus and be flooded with memories of dun-colored grainy casseroles from the hippy era, hippy-dippy potlucks composed of casseroles and salads, long hair, long skirts, free-love, and.... Mary Jane. Homegrown. To be had by the entire ounce. Rainbow thoughts from so long ago.

Well, I was sitting out front at our lovely little Co-op last Saturday, my bags full of farmers' market shopping, just talking to friends and relaxing. Peter was at the cash register, checking out floods of shoppers.

Peter has developed this lovely practice of offering tastings of some of his specialties every shift he works. You walk into the store and see that Peter is there and your eye immediately flips down to see what he's offering today and that might be Tortilla Espagnol, a thick but light and tasty concoction of potato slices cooked with eggs in omelet style; creamy guacamole; various red or green salsas, either as accompaniments or on their own with chips; Mexican cornbread, which is my favorite; or, as on the day I speak of, hummus. It was the best hummus I'd ever had.
I had to take an appetizer to dinner that night, so in between customers I asked Peter for the ingredients. Like any good cook he was pleased to share them, and I jotted them down.

Photobucket


Peter's Hummus
Okay, let's take these by amounts.

Chick Peas: I'd already cooked a bunch and froze them in quart freezer bags. I defrosted one bag, so that would be 3 to 4 cups, or two smaller cans of chick peas. Drain them, but save juices to moisten the mixture.
Tahini: Two or three heaping tablespoons full.
Garlic: 2 or 3 cloves.
Lemon juice: Use the zest from half a lemon and the juice from the whole lemon.
Cumin: I toasted about... 2 teaspoons of cumin seeds and ground them in a spice grinder.
Tamari: A good glug, say, 2 tablespoons.
Salt: To taste.
Olive Oil: Pure, extra-virgin, about 1/4 cup. Plus more over the finished dish.
Roasted dark sesame oil or really good peanut oil: To taste.

Photobucket

Toss the chick peas, tahini, garlic, lemon juice, cumin and tamari into the food processor and process until ground, with some texture left. Add enough bean juice to make the correct texture, not too dry, then finish with the olive oil and flavored sesame oil.

To serve: Spread the hummus on a platter, surround with chopped parsley, drizzle with more olive oil, strew with halved, sliced red onion and olives. Scoop up with tortilla chips.

Fava beans stand alone in their flavor, tasting... well, so hard to define. Do they have a bit of bitterness? Well, maybe not, but they side very well with broccoli raab. Very interesting taste. You can get them fresh in a few weeks, or months, and I buy those in their thick fuzzy skins, but I usually cook the dried ones.

They might be dried with their skins on, in which case soak them overnight and then peel each bean of its leathery skin.

favas

What I find at the Co-op are ones that have been skinned and then dried.
favas


They take about 45 minutes to cook. They'll break up to some extent, but let them cool in their own water/sauce, spread them on a platter, drizzle with lots of good olive oil, sprinkle with finely chopped garlic, chopped cilantro, and then red pepper flakes. Dip up with tortilla chips, or spread on good, dense, thinly sliced bread.

fava beans

Wednesday, March 25, 2009

Sometimes a Bad Notion

My my my. How long have I been cooking and baking?
Not long enough to learn anything, I find.

When I posted about baking cream puffs in maple syrup, I hadn't tried them yet.
Cream puffs, of course, should be dry and crisp on the outside, hollowed out on the inside with still some eggy string-like filling that should be scooped out before they are filled with a sweet or savory substance.

So I performed the experiment. They came out of the oven tiny, not puffed, and eggy, while the maple syrup had cooked down into partly burned and partly hard candy. These weren't bad tasting, just not cream puffs, and really unwieldy to be scraped from the pan.

Why did this happen? Well, cream puffs, we will remember, need a hot, steady, dry heat to bake properly, and baking them in a liquid provided diametrically opposite conditions. And baking biscuits in maple syrup for 12 minutes provides just enough time for the syrup to thicken a bit and perhaps turn custardy. However, the cream puffs bake for 4o to 50 minutes, evaporating the syrup into candy.
Photobucket

Big waste of maple syrup!

Monday, March 23, 2009

Sugaring, and a Vinaigrette

...quoting myself...

from a monthly subscription foodletter I put out back in the day called Cookspeak, a seasonal narrative with Recipes. Quotes here were from Issue 5, Mar/Apr 1995 called Tapping into Spring.


Photobucket
Kate Fredette refuels the evaporator. She and her husband Ken will boil down 40 gallons of sap for
each gallon of maple syrup, and this year will get 4 or 5 gallons of syrup.


“Look at it this way. If you’d been hibernating in a primitive abode made of stone or animal pelts, as in a cave or a tent, a yurt of some sort, or within bricks or wood-frame or logs, for that matter, and it came to be this time of year and your dried berries were giving out and the grains had become somewhat beetley, and your normal quiet cheer had receded to reveal the roots of desperation, then you would be glad, nay you would be ecstatic, when the days reached above freezing and the nights reached below, to go out into the mush by day (that turned to frozen ruts by night), to slash the maples and to gather the sap in buckets or waiting troughs and to boil it down into sugar. You would be glad, you can bet, if need be, to exist on nothing else but that sweet in Aprils that were slow to show green shoots pushing up anew.”


Maple Garlic Vinaigrette


Savor this splendid, fruity dressing with savory depths with that early spring mesclun mix that you can find in your own garden as spring progresses – the first little knobs of tarragon, wintered over small leaves of chicory, radicchio, chervil, sorrel. It goes with any spring green, even dandelion leaves, or the fiddleheads that we will talk about soon. If you have any raspberry vinegar left from last year, use it. This dressing can be made in the blender, whereupon “vinaigrette” will be a misnomer, because if you add the oil very thinly and steadily the texture will be that of a mayonnaise. It keeps, refrigerated, for a very long time.

Ingredients:
• 2 cloves garlic, peeled, chopped fine
• 2 tablespoons shallot (or onion), chopped fine
• 2 tablespoons Cider vinegar
• a grinding of pepper
• ¼ teaspoon salt
• 1 to 2 tablespoons maple syrup
• ¾ cup extra-virgin olive oil
• ¼ cup walnut or hazelnut oil (optional. If not using, increase the olive oil to 1 cup)

Whisk the garlic, shallot, vinegar, pepper, salt, and syrup together, then whisk in the oils in a thin stream. Correct seasonings.

That’s it!


Tuesday, March 17, 2009

Maplin'

It's maple sugaring season here in Vermont, an activity that is undertaken when the days are sunny and above freezing while the nights still dive below that cut-off point. On Sunday we walked up the road to where neighbors were boiling off maple sap in a little gyro-gearloose open-air arrangement up on their hill. I was feeling snivelly, so had forgotten my camera.
Photobucket
Not a sugar shack, just a beautiful (real spring) placeholder

But I've written about sugaring season so many times over the years that there's little use in covering the same ground again. Still, my tastebuds are continually hungering for one or another of the uses of maple syrup I outlined in an April, 2007 Twice Bitten column you can find here. I particularly need to try Ginette's Maple Sugar Grandfather.

I was reminded of it (stay with me, here) when I was reading Amanda Hesser's column on popovers in the March 15 New York Times Magazine. She included a recipe for Sugared Puffs, wherein the popovers are finished by brushing each with melted butter and dipping in sugar and cinnamon.

I thought those would be great with maple syrup, but because I couldn't think of how to make thin popover batter hold together in maple syrup, what popped into my mind was a sturdy pate' au choux baked in maple syrup similar to Grandma's Maple Sugar Biscuits (below).

Yes, I know, I am so maple syrup addled that, describing my train of maple-syrup-thought, my words are tripping each other up.

Still, I can't resist posting this now, and if I get up my courage to bake the 'cream puff' batter in maple syrup I'll post that later. *

Two Pies & a Grandfather

Ginette Turgeon’s MAPLE RAISIN PIE

In a saucepan combine ½ cup water, 2 tablespoons cornstarch, 1 ½ cups maple syrup and 1 cup raisins, bring to a steady but not roiling boil and keep it there for 10 minutes. Pour into a 9” pastry-lined pie pan and finish with a top crust. Bake at 375 degrees until the crust is golden, about 35 to 40 minutes.

Ginette’s MAPLE SYRUP GRANDFATHER

In a deep and wide saucepan combine 3 cups maple syrup, 1 cup water and a pinch of salt and bring to a low boil and boil for 10 minutes.

Mix up the dumplings: 2 cups flour, 2 tablespoons baking powder, ½ cup butter and ¾ cup milk.

When the syrup is ready turn the heat down until you get a nice active simmer and drop the dough by tablespoons on top, cover, and continue to simmer for 20 minutes without removing the cover.

Bonnie Baird’s MAPLE WALNUT PIE

Combine 1 cup maple syrup, 4 beaten eggs, ½ cup sugar, 1/3 cup melted butter and 1 1/3 cup chopped walnuts. Pour into a single pie crust, and bake at 350 for 15 minutes, covered with a piece of foil; uncover and bake another 25 minutes.


Larry Myott’s GRAMMA’s BISCUITS AND SYRUP

Put two cups maple syrup in a 9x9 inch baking pan and heat it to almost boiling. [this can be done in the oven] Make your favorite biscuits, cut them out, and lay 9 of them into the syrup. Bake in a 400 degree oven until browned.

Dumplings or biscuits could be served with ice cream, beside a baked apple or poached pear, or perched on top of homemade chocolate pudding made with a good, dark chocolate.

*Courage, you say? Well yes, if I successfully oven-poached pate' au choux in maple syrup I might have to eat them all!

Sunday, March 15, 2009

Mexican (or not) Shrimp Quiche

Here is a little ditty I used to sing long ago, at least once a month, a melody of shrimp quiche.

Photobucket

Its concept popped into my mind last week, and thus began a search for the original recipe. I found it, with unusual success in these days of searches for lost things, and realized a few things:

First, this is Dave and Janis Murray's Mexican Quiche it says so right there on the clipping scotch-taped to a recipe card and a quick googling found it on the web under that exact name and in all its detail (amazing world we live in);

Second, that it came from the New York Times Magazine which meant that, obviously, Dave and Janis were big food names, even though I, for one, couldn't recall anything more about them;

Third, that this recipe deviates from my usual ratio for custards of 1 cup liquid/1 whole egg/1 yolk. Well, just slightly;

Fourth, that it violates a reluctance I feel toward combining shrimp, or even any fish, with cheese. I know – that's weird, and who cares!

But finally to the real, Fifth, point: What makes it Mexican? Why, nothing more than the addition of bottled taco sauce after the thing is made, which was obviously done to extend and complement the use of chopped, canned, green chilies in the quiche itself, and that's what gives this pie its singular and memorable taste – the meaty, oceany taste of shrimp meets that sharp green taste of the chilies, all held commingled in a creamy, light filling.

Creamy? Well, let me diverge from my own opinion. The consistency of a perfect quiche or custard is, to me, not at all dense, but a combination of creamy milk and egg that remains light, so that when a fork is put down through it it separates into cubes of goodness, almost as though its molecules were long instead of round, and a sheeting effect had taken hold.

That perception goes all the way back to the heyday of the old Back Home Cafe on Center Street in Rutland (VT), when Kim, I think it was, made quiche with various fillings and they were served with Tassahara whole wheat bread and butter, and spinach salad with bleu cheese dressing. Those quiches broke apart into trembling cubes of goodness.

What is the secret to that delicacy? It's one that does not wholly and consistently reveal itself to me through various actions. Beating the eggs slowly but thoroughly, incorporating little air but combatting the inherent stringiness of the egg. Putting the prepared quiche into a very hot (450) oven for five minutes to let the bottom crust crisp and to bring the custard to a certain temperature quickly, then turning the oven down to low (325) for another 20 minutes, so as not to curdle the custard. I believe that all of these actions can determine the finished consistency, but they are not foolproof.

But, these considerations aside, on to the main event. Ladies and Gentlemen, I give you

Photobucket

Dave and Janis Murray, and their Amazing Mexican Quiche
Serves 6
Ingredients

* Pastry for a one-crust pie
* 14 shrimp, about 1/2 pound, shelled and deveined
* 1 4-ounce can green chilies, preferably chopped, about 1/2 cup
* 1 cup grated cheese, preferably half Colby and half Monterey Jack
* 3/4 cup light cream
* 3 eggs, beaten
* 1/3 cup chopped chives
* Salt to taste, if desired
* 1/3 cup sour cream
* 2 tablespoons bottled taco sauce or tomato and Serrano chile sauce

Preparation

1. Preheat the oven to 425 degrees. Line a nine- or 10-inch pie plate with the pastry.

2. Bring enough water to the boil to cover the shrimp when they are added. Add the shrimp and cook two minutes. Drain.

3. Chop eight of the shrimp into small pieces. Keep the remaining shrimp whole and set aside.

4. Scatter the chopped shrimp over the bottom of the pastry. Cover the shrimp with layers of chopped green chilies and the grated cheese.

5. In a mixing bowl, combine the cream, eggs, chives and salt and beat to blend. Pour the mixture into the pie shell.

6. Place the dish in the oven and bake 15 minutes. Reduce the oven heat to 300 degrees and continue baking 35 minutes or until the filling is set.

7. Remove the pie from the oven and let rest 15 minutes. Spoon six dollops of sour cream in a circle about halfway between the center of the pie and the crust. Dip each of the remaining shrimp in the taco sauce or tomato and Serrano chile sauce and arrange one shrimp on each dollop of sour cream. Cut into six wedges and serve warm.


My Idiosyncratic Way

Now, that by itself is perfectly wonderful. No need to change a thing. But, of course, I did.
  1. I do not use bottled taco sauce, so I didn't use any at all. But it would be great served with freshly made, creamy guacamole, or even good salsa with tortilla chips.
  2. And don't even think about using fresh peppers. It is that tangy almost metallic taste of the canned ones that is so good here.
  3. I chopped all the shrimp and used them in the pie.
  4. I did dot the top with a crème fraiche that I had already made.
  5. I did bake it in a preheated 450 degree oven for 5 minutes, turned the oven down to 325 for another 20 minutes. I'd make it 15 minutes next time.


No matter how you serve it it really is delicious.

Afterthought: I couldn't quit thinking about the Murray's, and so did some more investigation. Apparently this recipe, published in the New York Times Magazine in 1986 by James Claiborne, constituted their 15 minutes of at least New York Foodie fame. They now live in St. Louis, where they are still public people she is a home and garden reporter for Fox News and he is a meteorologist.

But what a lasting 15 minutes!

Wednesday, March 04, 2009

northern biscuits

When my daughter Isobel and her SO, Jesse, were here last summer and nosing around for breakfast, they stuck those shapely protuberances up when I told them there were biscuits left over from the night before. They were not intrigued. But once those biscuits were warmed and in front of them Jesse said, “Ummm. Real biscuits!”

just plain biscuits

I had forgotten that where they live in the south biscuits are no treat. Though they’re offered for every breakfast-out they are lackluster excuses for the real thing. Imagine! One thinks of the south as the ancestral home of exquisite biscuits. And it is, actually! It’s just that they’ve become too familiar, and the technique has deteriorated with a let-them-eat-cake mentality.

Here, they’re special, occasional, treats. Chicken and Biscuits, for instance, which I can count on to cheer Leo up. Or last night’s biscuits split and griddled, eaten with butter and jam or maple syrup for breakfast, or stuffed with good ham and warmed for appetizers or a small supper that evening. Try them as the foundation of that wonderful bacon sandwich I talked about earlier.

biscuit bites

Of all the biscuits recipes available, I love two of James Beard’s offerings. Mostly, when I have enough heavy cream – usually on Tuesdays when I get my quart of fresh, thick, unpasteurized Jersey cream – I make his cream biscuits, which I found in the elegant little autobiography, Delights & Prejudices. Otherwise, I’ll go the buttermilk route, a recipe from his American Cookery (which is indispensable in the way that Joy of Cooking is indispensable).

Good flour – I use King Arthur’s – and good butter – I use an Amish butter that comes in 3 pound rolls – and, especially, good, and not old, baking powder or soda are essential. If your biscuits don’t rise well, toss the baking soda or powder and invest in some fresh! Better yet, pick up a can whenever you think of it; and discard the old one if you can’t remember when it was opened. It would probably be a good idea to write the date on the can when you open it. If it’s three months old or so, toss it.

Let’s Wonderful Sweet Cream Biscuits
(From James Beard’s Delights & Prejudices. Let was the Beards’ beloved Chinese cook;
and these are sumptuous, soft, airy little things)


Sift 2 cups flour, 1 tablespoon sugar and ½ teaspoon salt with 3 teaspoons baking powder. Fold in heavy cream until it makes a soft sough that can be easily handled (1 1/4 to 1 1/2 cups) . Turn the dough out on a floured board and pat to about ¾ inch thickness. Cut it in rounds or squares, dip them in melted butter, and arrange them in a buttered baking sheet or pan. Bake at 425 degrees for 12 to 15 minutes. Serve the biscuits hot.

My idiosyncratic way: Heat a heavy baking pan with the oven. I measure by weight, using 9 ounces of flour, no sugar, and 1 teaspoon of sea salt with 1 tablespoon baking powder. Fold the cream in as directed. I don’t dip into melted butter, but put them on the sizzling hot baking sheet and bake for about 12 minutes.

Buttermilk Biscuits
(From James Beard’s American Cookery. These have more substance than the cream biscuits, and a delightful buttermilk taste. I once made them with real buttermilk – the whey left over from the making of butter – and they were outstanding. They are almost as good with a good commercial cultured buttermilk, and they last longer, because the raw butter whey gave these biscuits quite a er, ah, ‘nose’ the day after.)
  • 2 cups flour
  • 2 ½ teaspoons baking powder
  • ½ teaspoon salt (I use more)
  • ½ teaspoon baking soda
  • 1/3 cup butter
  • ¾ cup buttermilk
Combine all the dry ingredients and sift into a mixing bowl. (I never sift, just whisk).
Add the butter and blend in well.
Stir in the buttermilk and blend until the dough holes together.
Turn out on a floured board and flour the top of the dough lightly.
Knead about 3 minutes and then pat or roll out in a circle about ½ inch thick. cut the biscuits any size you like, dip them into melted butter (I don’t), and arrange on a baking sheet (yes, I use the preheated pan), and bake at 450 degrees for 12 to 15 minutes.

I served these last night with poached chicken in gravy with collard greens. More about that later.

chicken and biscuits

This morning, one of my favorite food bloggers, Lucy Vanel, wrote about an intriguing thing – fast puff pastry. Hmm. Made much like biscuits. Give it a look here.

Monday, March 02, 2009

brocc reincarnate

Okay, now that everyone’s greeting me with a grin and a “Sooooooooo, you don’t like Kale either, huh?”, I’ll confess to another character flaw – and that is that broccoli, of all things, had lost its appeal to me.
“Broccoli,” you say, “well then what green vegetable’s LEFT to eat in the winter?”

Exactly!

Photobucket

The situation was dire – DIRE, I say! I used to like broccoli. Had they changed it in some way, as they changed pork? I hear the most well-intentioned people bragging about their pigs being bred for LEAN. Who in god’s name wants a pork chop bred for lean? It’s that old cholesterol scam, punishing the American palate and environment by insisting that cholesterol in one’s food translates directly to plaque build-up in one’s arteries.
But what could they possibly have done to broccoli? And why?

Suddenly, boiling it or steaming it leaves the stems as hard as something you’d chuck into the fireplace to burn all night, and the blossoms mushy. Ick. Stir frying was kind of the same thing – take your choice of well-done or woody. And where’s the taste. I roasted it, because, like Kale, roasted broccoli has lots of adherents fainting with pleasure. Didn’t turn me on. Not one iota – charred at the edges, while everything else remains challenging, unless you char it clean through, and then you’ve got, well, a mouthful of ashes.
But I love, love, love broccoli raab, that slightly bitter green that LOOKS like baby broccoli but tastes so GOOD, and tangy, the bitterness mellowed by olive oil and garlic, then brought back to kingliness by a sprinkling of hot pepper flakes. Just like Al Ducci’s, down in Manchester, does it. I could eat that all day, and sometimes do!

By the way, raab, or rapini, or even rape, is more closely related to the turnip than to broccoli, the stems are thinner than broccoli, it’s leafier, and the heads are small and numerous. You eat them all.

And the way you achieve that flavor and texture is to toss the raab into boiling salted water and bring it just back to boiling, hold it there maybe a second more, then drain it. In the meantime you’ve warmed about a quarter of a cup of olive oil in a sauté pan with a finely chopped clove of garlic. When the raab is drained, and the garlic has had time to flavor the olive oil without turning a bit brown, turn the heat to high under the pan, and when the oil is hot (don’t let that garlic turn) throw in the raab and shake, rattle and roll until the raab is hot, has cooked a couple minutes more and is, my goodness, coated with the oil. Sprinkle with salt to taste, then a teaspoon or so of hot pepper flakes, and there we go! Serve it warm or even cold. Put it in a sandwich. Al Ducci’s makes a raab sandwich on their little flatbreads that are split in half, with Al Sheps’ fresh mozzarella and lots of that garlic olive oil. It is a treat!

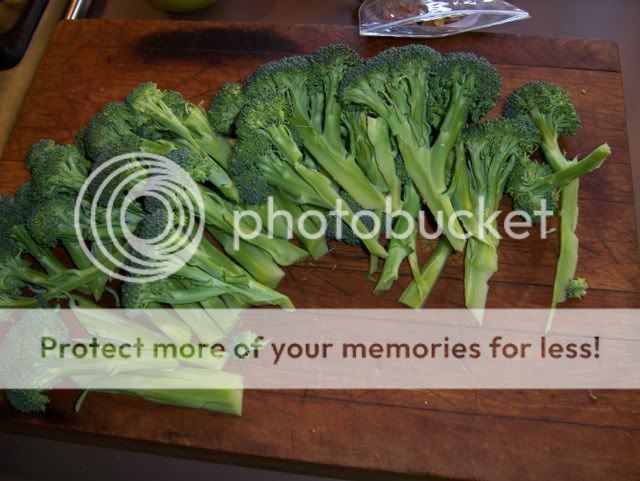
So! Why not try that same thing with regular broccoli. I trimmed the stems, peeled them, then split the stems in quarters and pulled them apart without cutting the blossoms, and proceeded. I knew it was good for supper that night, but when I found myself at the counter next day eating it cold, straight from the fridge, for breakfast, I knew I’d got it right.

Photobucket

Now if it was that good by itself, imagine how good it’d be on a pizza.

Pizza Brocc

This is a quick crust that rises usually for no more than an hour. I use half of it for one pizza, and bake off the rest as a fat flatbread. It rises quickly because of the large amount of yeast and the warm water. I sometimes use quite hot water. The unbaked portion can be wrapped securely in plastic and stored for a day and a night in the fridge. I make this with a an electric mixer using a dough hook. The metal bowl of the mixer, when fitted tightly with a plastic bag and placed in a warm place – I place it on top of the pilot light of my range grill – provides the perfect environment for rising.

For the crust:

• 4 cups flour
• 1 teaspoon sea salt
• 3 tablespoons olive oil
• 2 rounded teaspoons yeast
• 1 ¾ cups warm to hot water

Whisk the first four ingredients together, then slowly add the water while the mixer is doing its thing. Beat the dough for several minutes to develop the gluten, then place a plastic bag over the bowl and leave it in a warm place to rise.

Prepare the fillings (for one 14-inch pizza):

• ½ onion finely chopped
• 1 or 2 cloves garlic chopped fine or sliced thin
• 2 cups grated cheese (mixture of swiss and parmesan is good)
• broccoli or broccoli raab prepared as noted
• whatever else you must have – sliced black olives, slivered mushrooms, thinly sliced cooked sausage; or nothing more. Remember that too many or too much makes a sloppy pizza with unidentifiable flavors.
• Olive oil

Assemble and bake:

Heat the oven to 450 degrees. Place your pizza pan in the oven while it heats. I use a heavy cast-iron platter.
Scrape the dough out onto a well-floured surface. Cut in half, form a little loaf with one half and set aside. Roll out the other half to the size of the pan. Take the pan from the oven, drizzle with olive oil, fit the crust onto it, sprinkle with olive oil, sprinkle with salt, sprinkle with ½ of the cheese, sprinkle with the chopped onion and garlic, arrange the brocc over the top, follow with optional additions, then top with the rest of the cheese, slide into the oven, and bake for 20 to 25 minutes, until the top is browned and bubbling.

Proceed with the second pizza, or remember to wrap that dough securely in plastic (so it doesn’t burst out of loose corners) and refrigerate.

Pizza Brocc

The flatbread

When you’re ready to bake that off, say into a flatbread, take from the fridge, unwrap onto a floured surface, let it come to room temp, heat the oven and pan to 450 degrees, pat the dough into a flattened loaf maybe 8 inches in diameter, take the pan from the oven, sprinkle with olive oil, arrange the loaf on the pan, dimple the top by pressing your fingers in firmly, drizzle with olive oil, sprinkle with thinly sliced garlic, if you like, and sprinkle with salt. Bake off for 20 minutes or until bread is risen and golden.

...a good practice...

I’ve been trying to get Dennis Duhaime, the Co-op’s produce manager, to stock broccoli raab while it’s the season for it. The problem is that he stocks a specialty item and it languishes, and too often gets tossed. Not good for the Co-op’s sustainability! So make it a practice to show him you appreciate his efforts by buying something out of the ordinary when you see it. I bought escarole for that reason, chopped it, sautéed it briefly with garlic in olive oil, then stirred it into mashed potatoes in a classic preparation. I even told him I’d do a demo of broccoli raab if he’d get it in. He sold out of the raab when people could taste it and get a recipe for it. So try something new when you see it, and gradually the Co-op’s selection will broaden. Better yet, bring in a recipe or two to show people how to prepare your heart’s desire. Want to go all the way with it? Tell Dennis you’ll do a demo. That kitchen is very satisfying to work in.

...the Co-op’s own...

Peter McGann will be the guest chef on the next edition of What’s Cookin’ Rutland, to be taped before a live audience at Peg TV on March 16. Peter is the well-known-around-town instructor of the popular cooking classes in Mexican and World-Cuisine at the Rutland Co-op. He’s studied with major chefs and food people including Elizabeth Andoh (Japanese); Diana Kennedy (Mexican); and Paula Wolfert (Middle Eastern).
Peter will chat with host Whitney Lamy about the idiosyncrasies of Mexican food, as he demonstrates some of his techniques in making Chicken Enchiladas in Red Sauce. The audience will have a chance to taste his creations after the show..

What’s Cookin’ Rutland is taped at PEG TV Studios in Howe Center starting at 6PM. Doors open at 5:30 for the seating of the audience. A $10 donation is suggested, and reservations may be had by dialing 508-813-8114.

...words to end this ballad of olive oil and garlic...

“I am not trying to torture you, I promise. I know it must seem like I sit around all day, cackling evilly, stroking my black cat, scheming up ways to trick you into eating lima beans and kale, but I don’t. Cross my heart. I don’t even have a cat - although I do sometimes cackle, but never at your expense. Everything I do here, I do out of love.” Sound like anybody you know? Well, it’s not me – though I could have said it – it’s Orangette, from her blog .


I still don’t know what they’ve done to broccoli, whether it’s a conspiracy or aging tastebuds, but the right technique and enough olive oil and garlic doesn’t harm much of anything!